Buttons

Buttons

March 03, 2013

Eco friendly Shopping-Bag

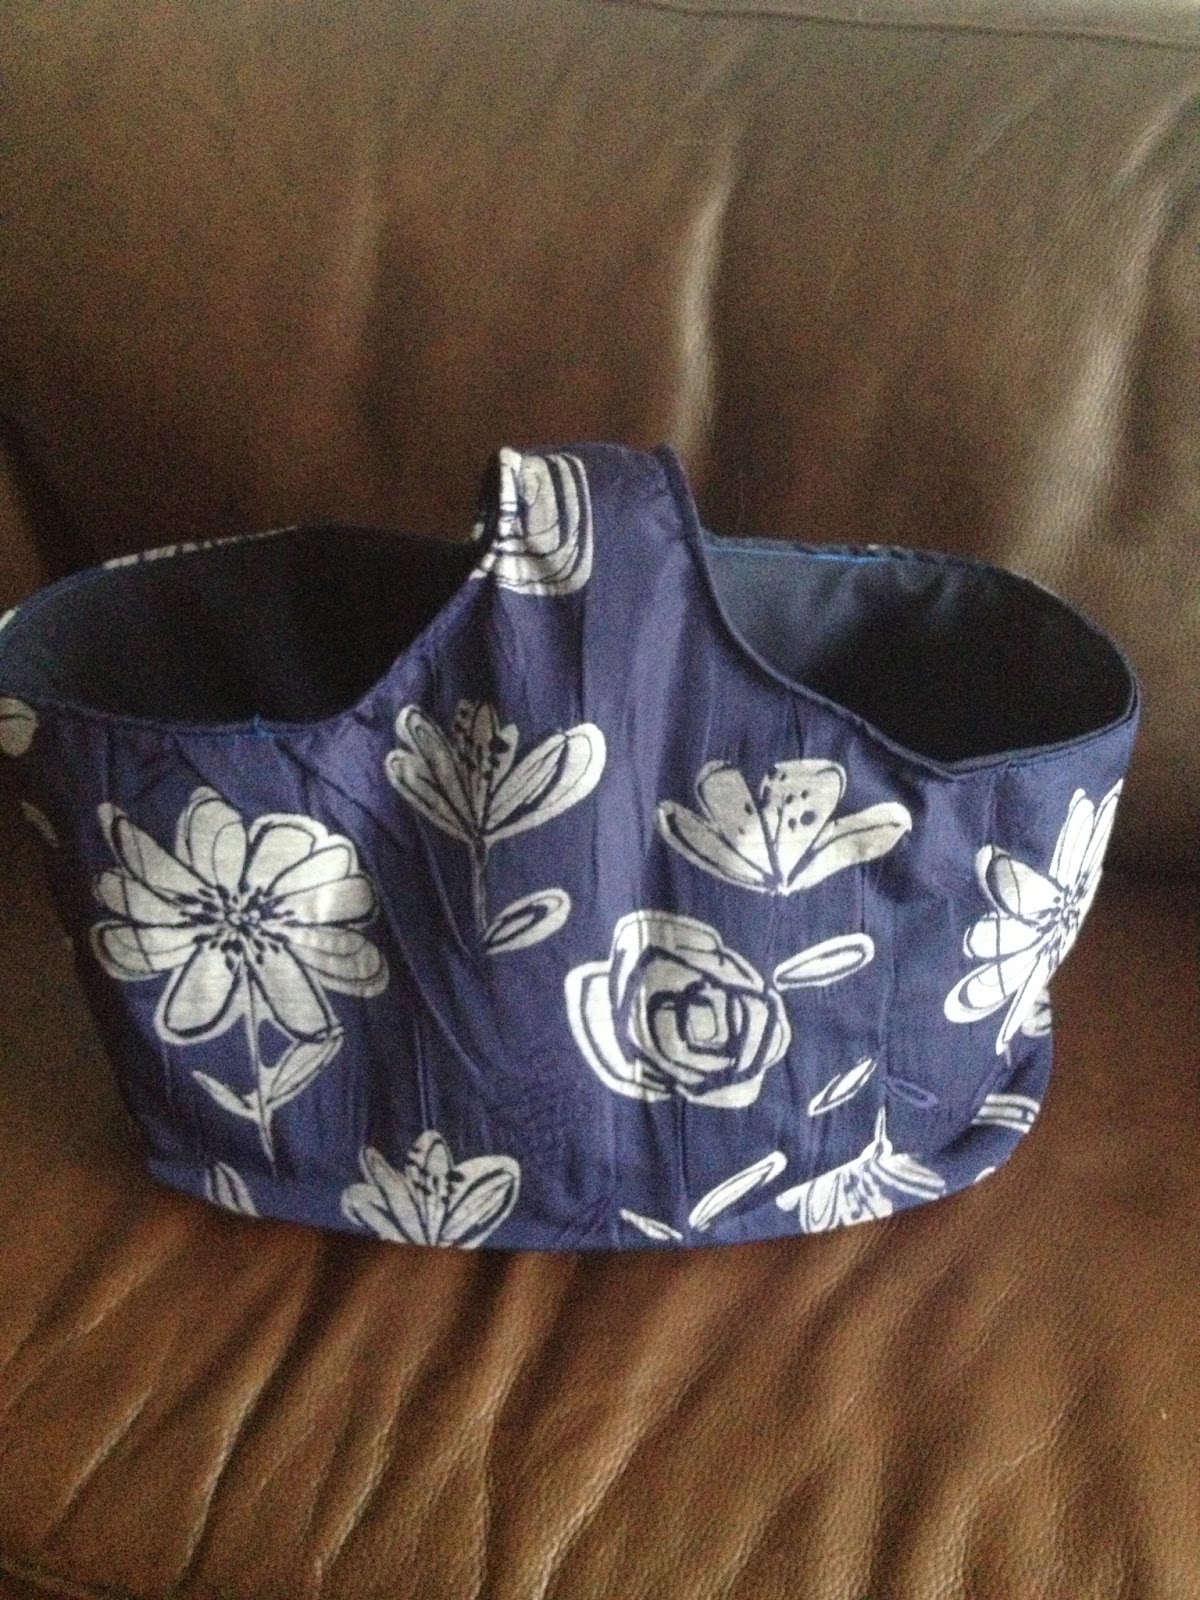
Like a lot of people I don't accepting plastic bags in shops and try and avoid them at all costs, I have dozens of those fold away bags but find them too small especially when I go to local the Saturday morning, so I made this bag. It can be stored flat so it doesn't take up too much space and can be made with spare material or less than a meter of fabric.
First, we need to make a pattern, get an old new paper, take out the middle page leave it folded and draw a line about a third of the way in and and a third of the way down the page and then the cut out for the handle, you can adjust the size to suit yourself, you also need an oval for the bottom, make sure the circumference of the bottom is the same as the bottom edge of the sides of the bag (all the way round).
Once that's done time to cut out the pieces, cut;
  • 2x sides in main fabric
  • 2x sides in lining
  • 2x sides in interfacing (fairly stiff if you have it)
  • 1x bottom in main fabric
  • 1x bottom in lining
  • 1x bottom in cardboard
Now lets put it together:

  • Iron on the interfacing to the main fabric
  • Sew the 2 sides of the outside of the bag together and do the same with the handle.
  • pin and sew in the bottom - I used the lining fabric for the bottom of the outside - your choice.
  • Do the same with the lining.

Now you have 2 'bags'.
  • Cover the cardboard bottom of the bag with cling film. (to stop it getting wet and ruining).
  • Turn the outside of the bag the right way round and put the cardboard in the bottom.
  • Put the lining inside the bag, so now you can't see the seams.
  • Turn in and pin the top of the bag and sew around the edge about half a centimeter from the top edge.
Now you have a strong cotton bag ready to use, to make it a little more durable I sprayed mine with water resistant spray. ENJOY.


February 24, 2013

Black Cat Birthday Cake

So, I made the cat cake and here's the result, my daughter loved it.

If you're going to make any 3-D it's best to make a sketch  of it first and work out how many cakes and what shapes you need to make for the cat I used a one pound pudding bowl and a large long tin. The other thing to be aware of is that you need a cake mix with a fairly dense, using a simple sponge mix will make it difficult to model. I used maderia cakes. Before making the cakes you need to work out how many and what shape cake tins you need to use, for my cat I sketched it first (see my previous post) and then I worked out I needed one long tin for the body and back legs and a 1lb puddling basin for the head.
 my recipe (enough for a 15cm cake tin), I used double the quantity :
  • 180g  Butter
  • 180g  Sugar
  • Finely grated zest of 1 lemon
  • 3 eggs
  • 220g plain flour
  • 2 teaspoons of baking powder
  • A pinch of salt
  • A pinch of cinnamon
  • 2 teaspoons lemon juice
  • a little milk
Turn the oven on to 160 degrees, prepare the tins, an easy way to line a tin is to screw up  piece of baking paper and then straighten it out again and then pop it in the tin.
Cream the butter and sugar so that the mixture is light and smooth in texture, then add the grated lemon zest.
Beat the eggs and add them little bit at the time making sure the mixture re,ains smooth.
Now stir the flour, baking powder, salt and cinnamon, adding milk as the mixture becomes too stiff.
Finally add the lemon juice.
Turn the mixture into the tin make a hollow in the mixture so that when done the top will be flat.
Put in the middle of the oven for 1.5 hours. To test if done press a knife into the cake, if it comes out clean it's done.

Now the fun begins, once the cakes have cooled down you can start carefully shaping the cake. First, I cut a slice off the end of the long tin to make the legs out of. Slowly and carefully sculpt your cat making sure the pieces fit together properly.


Once you are happy with the shape stick it together with either a little bit of icing or jam. To make things a little easier at this stage I cheat, I use ready rolled marzipan and ready made fondant icing. Now, position the cake on your base again using jam or icing and lightly spread apricot jam all over the cake and gently postion the ready rolled marzipan over the cake and press it onto the cat and cut away any that's unwanted. Roll out the icing on greaseproof paper, it won't stick and you can pick it straight up without worrying about it breaking once rolled. Again carefully, place the icing on the cat, don't worry about folds or joins you can sort them out later.

All done? OK, let's sort out those creases and cracks. Get a mug of hoz water and dip a round ended knife or spatular in the water and run it over the creases and joins, kind of spreading i the icing - don't worry the cracks will go and the icing will dry off.

Cut out the ears and stick them on and cut out the eyes using a little green and black icing and use chocolate matchsticks for the whiskers. I had enough cake left over to make a food bowl as well which I covered with and filled with smarties (every cake needs Smarties).

FINISHED.


February 09, 2013

Birthday cake on paper

So my eldest daughter is 20 on Monday and she has decided she wants a cake for her birthday, not unusual you say? and I quote ' Mum you know those cakes you used to make for us when we were small, fairy castles, trains, whales? I like one of those' .....

Well, here is the plan on paper, we have a cat Carl Pilkington, so this is going to be him. I'll keep you posted

January 13, 2013

Cute Pink Candles

One of the things I love doing is going round junk shops to see what I can find, there's always something that can be repurposed, mended or just given a bit of TLC. This morning was no exception I found these two really pretty bone china expresso cups and saucers.

Untitled

Get some composite wax, or bits of old used candles and measure enough to fill the cup, if you're using fresh composite wax add about 10 - 20% extra. You can get it at craft shops or even Amazon together with a pack of wicks shouldn't cost you more than €8,-.

Untitled

Before you start melting the wax prepare the wicks for each cup, I attached them to a disposable chop-stick but, you can use a pencil, knitting needle or anything you have handy.

Untitled

Now melt the wax, the easiest way is to use a saucepan of hot water and a plastic container, I added some orange essence before melting to make it smelly.

Untitled

Once it's melted carefully and quickly pour it into the espresso cups and put the wicks in.

Untitled

Now all you have to do is wait for the wax to harden and you have a couple of very pretty candles. You can turn almost any container into a candle in te same way. Enjoy! :)


Untitled

January 03, 2013

Piano Stool

My daughter has been playing the piano for years, her stool was in desperate need of an overhaul.

First, take off the cushion, in this case I gave it a good push from the underneath. Take off the material making sure that you keep it in one piece, here I had to remove what felt like hundreds of staples. Oh and remember the order they came off in.


Use the pieces as a pattern and pin them to the material you're going to use to cover the stool and cut out. It's easier without the cat!


Start putting the new pieces on starting with the last piece that came off, I used a staple gun, staple down one side and then pull taught and do the other side fold in the corners cutting away excess material.


When you've replaced all the pieces, pop in back into the chair, tighten the screws on the legs and hey presto new piano stool.

Follow Me on Pinterest